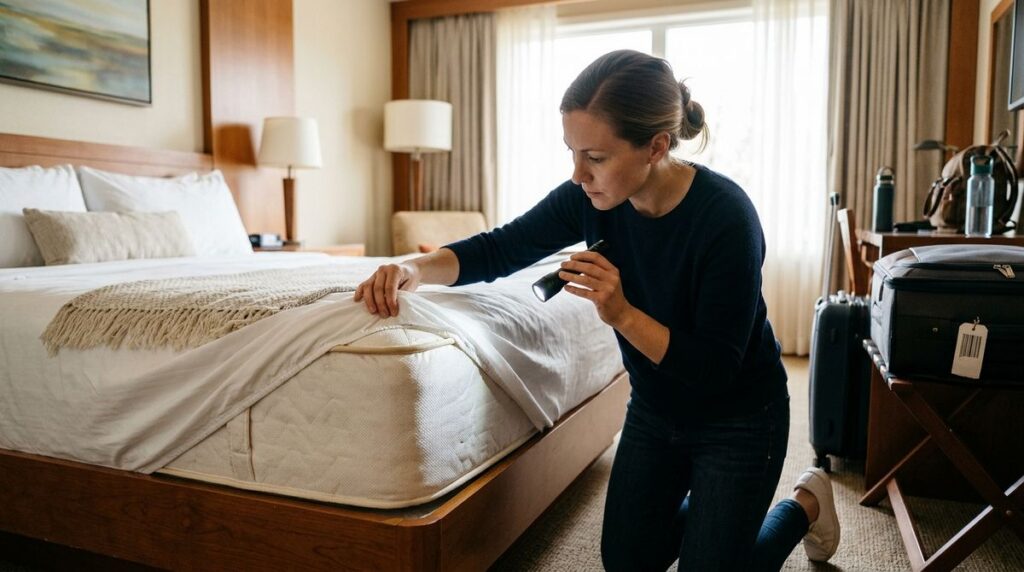
That uneasy feeling can arrive just as we are ready to relax: the children are tired, the bags are down after a long drive or balik kampung trip, and an unexplained mark appears on the hotel sheets. When we check hotel room for bed bugs concerns before unpacking, our aim is to keep insects away from our belongings and maintain that protection throughout the stay, not start treating the room ourselves. A roughly 10-minute inspection gives us a practical starting point, covering the bed, nearby hiding places and luggage area, although even a careful visual check cannot certify a room as bed-bug-free.
Gather a torch, sealable bags and a few uninterrupted minutes
What we’ll need
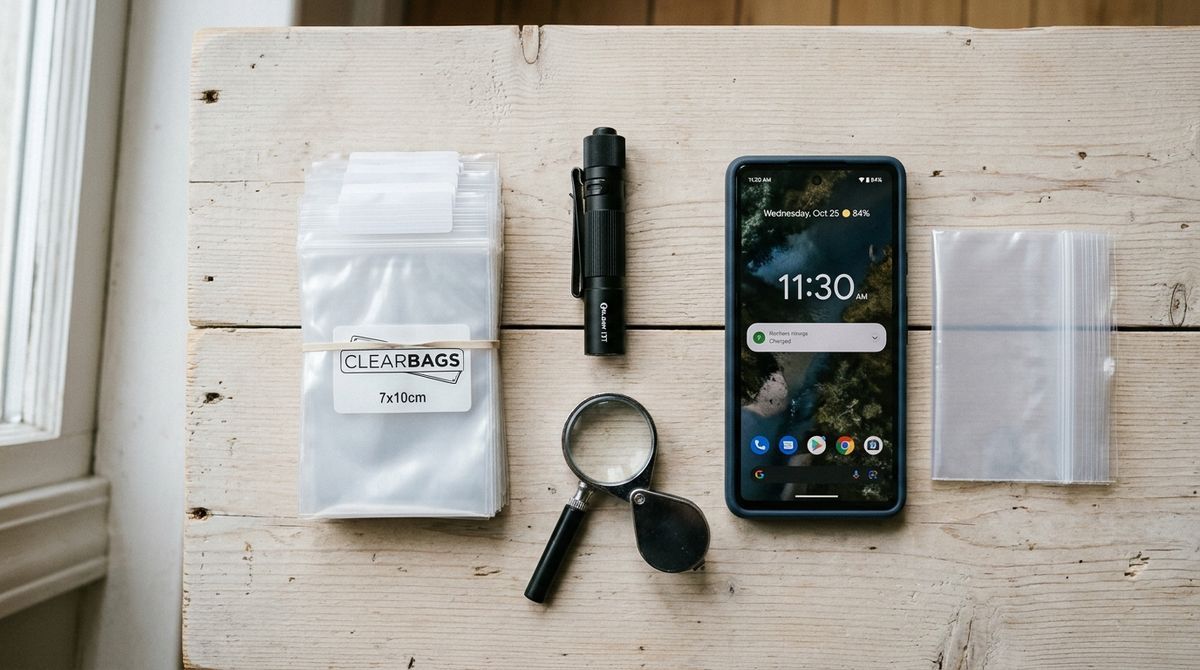
Our inspection kit can stay simple: a phone torch or small torch, a phone camera, clear sealable bags and, optionally, a magnifier. We also keep a spare bag large enough to isolate a small travel item, such as a handbag, travel pillow or pair of shoes. A charged phone matters more than specialist equipment.
We allow roughly 10 minutes for the initial check. Multiple beds, a sofa bed, a large suite or anything suspicious will take longer. That estimate is a planning aid, not a deadline that makes an unfinished inspection complete.
Before starting, we keep children and loose belongings away from the bed. One adult can supervise in a clear area while another checks, where that arrangement is possible. With only one adult, reception assistance is preferable to balancing a child while lifting bedding or leaning around furniture.
Protective habits come first. We do not need a repellent to complete this routine, and a product must never replace reporting evidence.
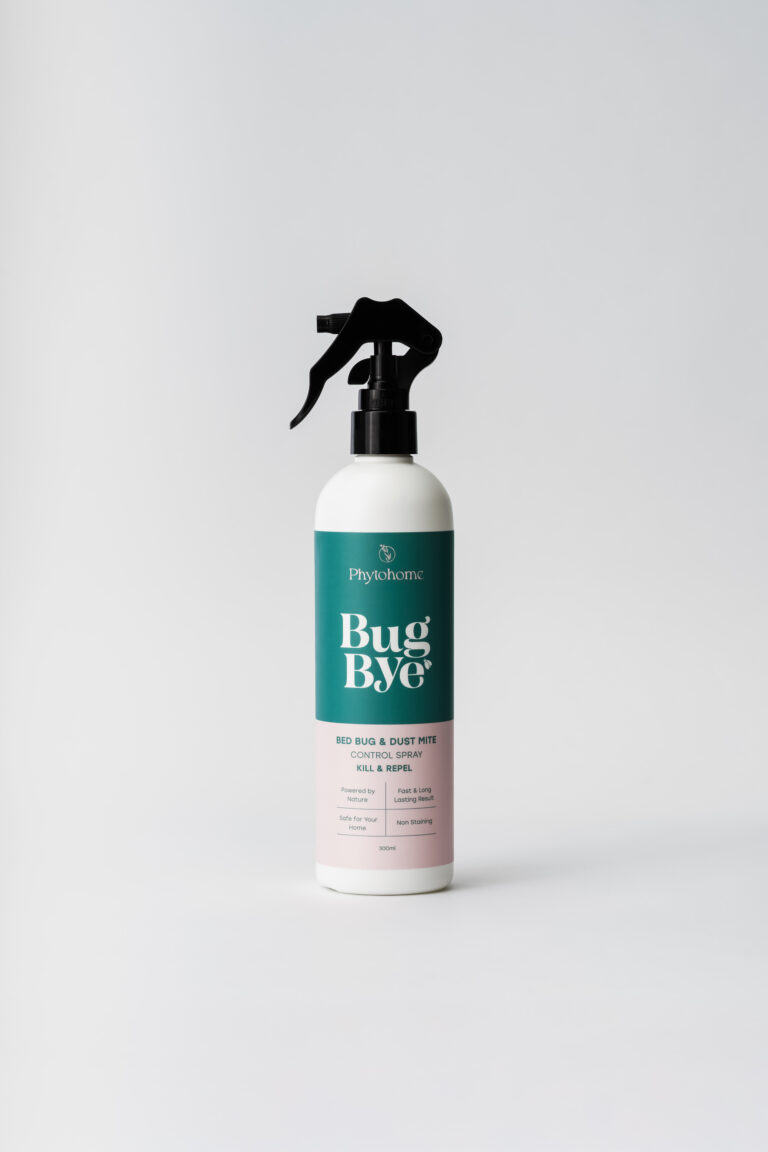
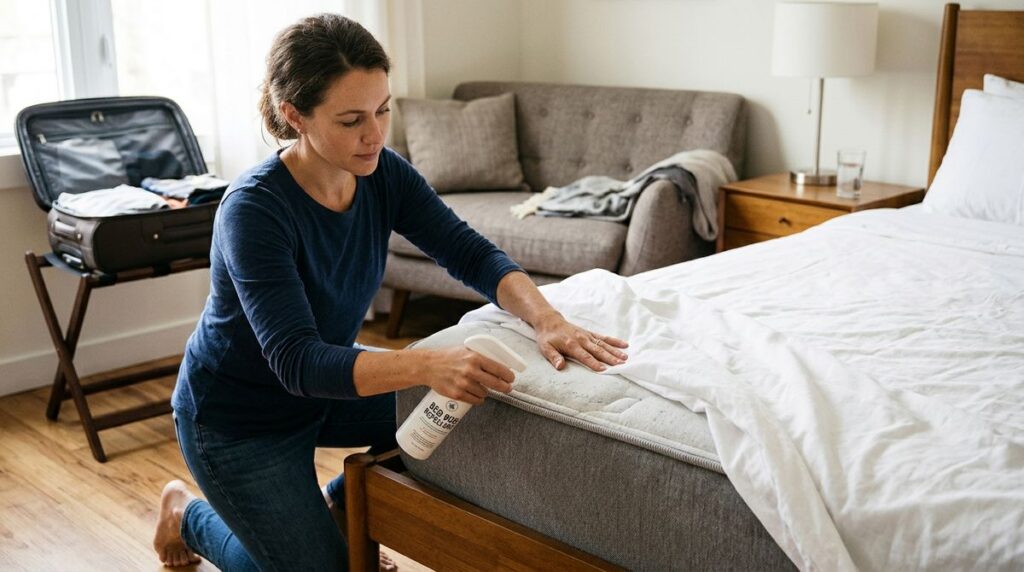
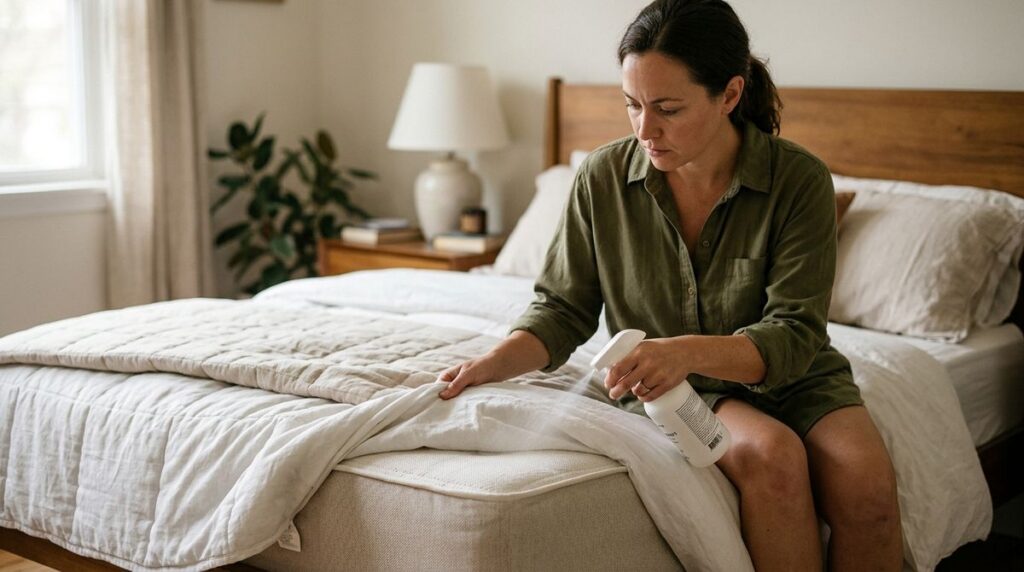
If a repellent forms part of our travel routine, its label must permit the intended pest, surface and setting. We mist lightly, ventilate, and let treated items air out for a few hours before sleeping on a bed or packing a suitcase, following any longer label requirements. Hotel furnishings are not ours to treat without permission.
The useful starting point is much less complicated: closed bags, good lighting and enough uninterrupted attention to inspect safely.
Step 1: park luggage away from the bed and soft furnishings
We begin with bags closed in a well-lit bathroom, on a clean, dry hard surface away from towels and laundry. If the floor is wet or the space is cramped, we ask staff for another suitable staging area rather than squeezing luggage against used linen.
A bathroom is only a temporary holding area. Tiles do not make the room pest-free, and nearby cracks or stored items still deserve attention. The point is to reduce immediate contact with the bed, carpet and upholstered furniture while we inspect.
Coats, handbags, children’s soft toys and travel pillows stay with our contained belongings. A quick handbag drop on the bed still creates contact, even when the main suitcase remains zipped.
Check a luggage rack before opening a suitcase
Before using the rack, we shine the torch along its straps, underneath the frame, and around hinges and joints. Fabric straps need the same attention as furniture seams, particularly where material folds around a fixing.
Once inspected, we position the rack away from walls and furniture where practical. We keep bags closed until the sleeping area has been checked.
Check: Our bags remain closed and off the bed, carpet and upholstery.
Fix: If belongings have already touched those surfaces, we stop unpacking. Contact alone does not confirm exposure, but any suspicious evidence means following the containment routine in Step 11.
Step 2: learn the signs before starting the search
Recognise adults, nymphs, eggs and shed skins
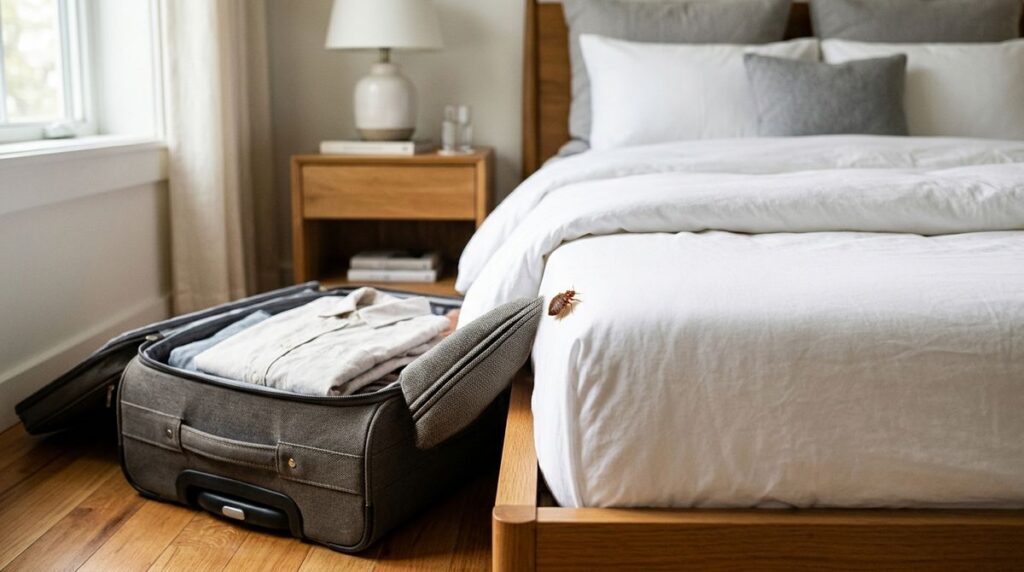
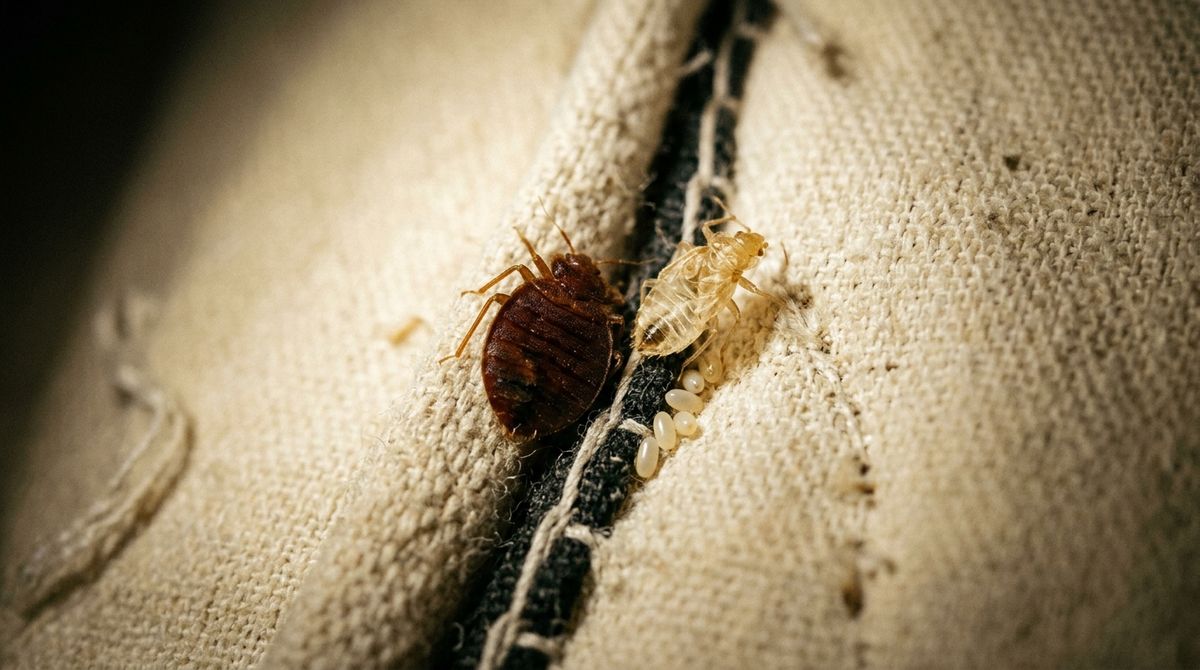
An unfed adult bed bug is flat, oval and reddish-brown, approximately 5-7 mm long, with six legs and two antennae. After feeding, the body can appear longer and fuller. Colour and size change, so an apple-seed comparison helps with orientation but does not settle identification.
Nymphs are smaller and paler, sometimes difficult to distinguish against light fabric. Eggs are tiny and pale, often tucked into protected crevices. Empty shed skins retain an insect-like outline, including recognisable body segments or legs, rather than looking like an ordinary loose fibre.
For a visual reference, we can compare photographs with the identification material accompanying the NPMA’s bed bug guidance. We use authoritative images as references rather than copying photographs without permission. (NPMA)
Both the common bed bug, Cimex lectularius, and the tropical bed bug, Cimex hemipterus, matter in travel discussions. The tropical species is relevant in Malaysia, but distinguishing the species is not part of our hotel-room task. Recognising a suspicious insect and preserving evidence is enough.
Separate suspicious evidence from lint and ordinary marks
A tiny brown object is not automatically a bed bug. We compare shape, legs, surface texture and whether an apparent “object” is actually a mark embedded in fabric.
| Possible finding | Shape and legs | Texture or surface clue | Fabric relationship |
|---|---|---|---|
| Suspected bed bug | Oval insect, six legs, antennae | Flattened or fuller after feeding | Separate insect, sometimes concealed |
| Carpet beetle | Rounder adult, six legs | Often mottled, with hard wing covers | Separate insect |
| Spider beetle | Rounded body, conspicuous legs | Shiny or hairy, not broadly flattened | Separate insect |
| Lint | Irregular, no organised legs | Fibrous, fluffy or threadlike | Loose or caught in stitching |
| Ordinary stain | No insect structure | Flat discolouration | Embedded in fabric |
| Shed skin | Hollow insect outline, possible legs | Pale, dry and delicate | Loose or lodged in a crevice |
Dark spotting and blood marks raise suspicion, particularly beside skins or insects, but either can have another cause. We give more weight to a cluster around a hiding place than to one unexplained dot.
Dust mites cannot be reliably identified during this torch inspection. Our guide to recognising early warning clues develops these distinctions further.
Check: Our identification rests on visible features and several clues, not colour alone.
Fix: We photograph and preserve uncertain evidence instead of guessing or crushing it.
Step 3: inspect the sheets, mattress seams and bed base
Scan the bedding before moving it
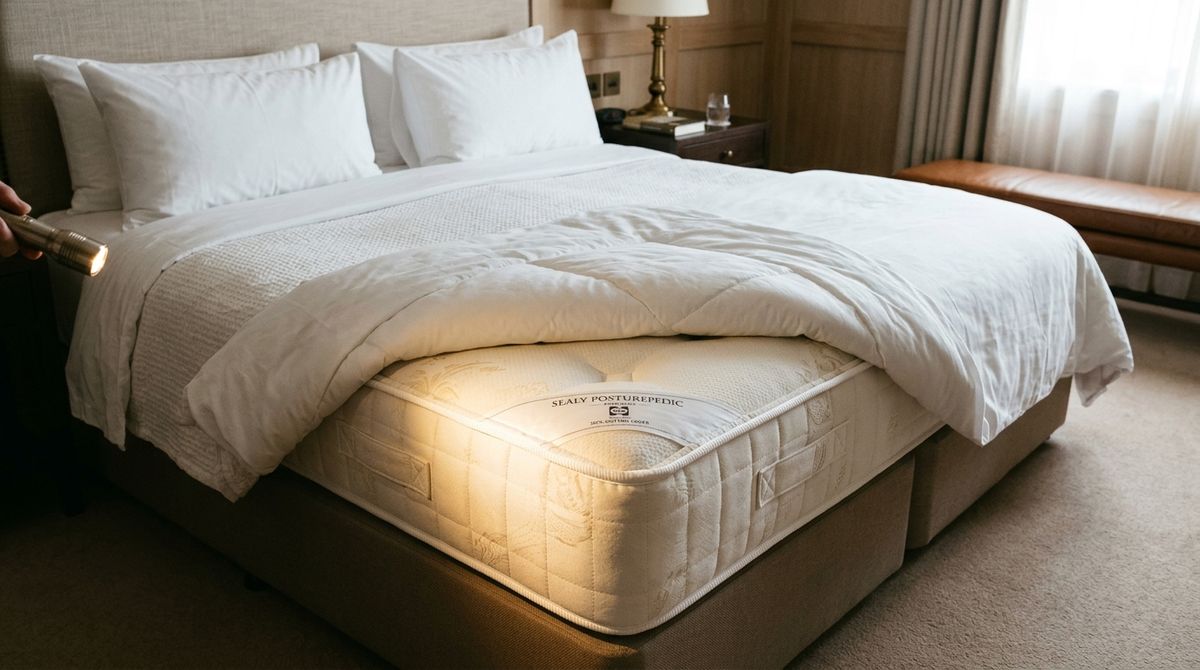
We turn on the room lights, then use the torch to direct light into shaded folds. Ceiling lighting alone can leave the most useful inspection points in shadow, especially beneath pillows and along dark piping.
Our first pass covers the pillows, pillowcase edges, exposed sheets and blanket folds. We look before disturbing anything. Shaking linen can scatter an insect or dislodge evidence that would otherwise show exactly where a problem sits.
We look for live insects, concentrated dark spots, pale eggs and insect-shaped skins. An isolated stain in the middle of a sheet deserves a photograph if uncertain, but a group of spots beside skins in a stitched fold carries a different level of concern. The location and combination matter.
We also avoid treating clean replacement sheets as an answer to suspicious evidence. Linen can be changed while insects remain in the frame or nearby furniture. A bedding change addresses the visible linen, not the whole sleeping area.
Trace the mattress piping, labels and corners
Next, we gently pull back the bedding far enough to expose the mattress edges. We follow the piping with the torch, working around each accessible side instead of repeatedly checking the same corner.
Labels, handles and stitched folds deserve a close look. We illuminate where a label joins the mattress, beneath an accessible handle and around tucked fabric at corners. The head end gets extra attention because it is close to a resting person, but the remaining edges still need checking.
The NPMA specifically recommends inspecting mattress seams, especially the corners, before settling into accommodation. Its travel guidance also extends the search beyond the mattress to headboards, sofas and chairs. (NPMA travel guidance)
We keep our phone in hand rather than resting it on the mattress between photographs. Clothing, camera cases and inspection bags stay away too. Otherwise, the checking process itself creates unnecessary contact between belongings and the area under inspection.
With twin beds or a children’s extra bed, we repeat the check on each intended sleeping surface. A clear-looking main bed does not speak for the rollaway beside it.
Check accessible bed-base seams without heavy lifting
We then examine the visible junction between mattress and base, followed by accessible fabric folds, seams, staples and edges. A divan or upholstered base can offer hiding places that are easy to overlook when all attention goes to the sheets.
If the mattress has an encasement, we check the visible zip, closure and fabric condition. We do not unzip it to inspect underneath. Opening an intact encasement interferes with its purpose and still would not establish the status of the whole room.
We do not lift a heavy mattress alone, tear the base covering or dismantle furniture. A limited view is a reason to acknowledge a limit, not to take a lifting risk. Where other evidence warrants investigation, staff can arrange safe access or a professional inspection.
Check: We have examined all accessible mattress edges and bed-base seams, including every bed intended for use.
Fix: If live insects or concentrated signs appear, we stop handling the bedding. Documentation and reporting take priority over completing the remaining search.
Step 4: check the headboard and bed-frame joints safely
Shine the torch along accessible headboard edges
A clean mattress is not the end of the inspection. Headboards contain joints, seams and shaded gaps close to the sleeping area, so we make a separate pass here.
We shine the torch along the top, both sides and the lower accessible edge. Where a gap behind the headboard is already visible, we illuminate it without pulling the fitting forward. Dark spotting around a fixing, a skin caught in upholstery or an insect inside a seam all deserve documentation.
A phone camera can help record an accessible view. We use zoom to examine an image rather than forcing a hand or the phone itself deep into a narrow gap. Zoom cannot reveal a space that the camera never captured, so a blurred or blocked view remains inconclusive.
Wall-mounted and upholstered headboards need particular restraint. We do not pull at panels, unhook sections or assume a decorative piece is freestanding. Hotel fittings can be heavy, wired or secured in ways that are not obvious from the front.
A tidy photograph of the front panel is not evidence that the concealed rear is clear. Our notes can simply record that only accessible edges were inspected.
Examine exposed frame joints and fixings
We move the light over visible screw recesses, exposed slats, leg junctions and frame corners. The aim is to see into existing crevices, not to create access by loosening anything.
Changing the torch angle can reveal a shape that blends into dark wood or fabric. We look from a second safe position where practical, keeping our feet on the floor and avoiding sharp edges beneath the bed.
Children remain clear of this area. A low frame can invite climbing while our attention is elsewhere, and a dropped torch or sudden movement makes a cramped inspection harder.
We also resist the urge to keep probing once credible evidence is visible. An insect disappearing into a joint is useful location information for staff; chasing it with a card or dismantling the joint risks scattering evidence.
Check: Accessible headboard edges and exposed frame joints have been viewed under directed light, rather than only room lighting.
Fix: If a fixed headboard blocks an important area and other signs are present, we request a staff-led or professional inspection. An inaccessible space is not a clear space, and reassurance alone does not remove that uncertainty.
Step 5: inspect bedside furniture, seating and luggage zones
Check bedside tables and nearby storage
We work outwards from the bed, beginning with bedside tables and storage that touches or sits close to the sleeping area. Drawer edges, handles, joints and readily visible undersides are useful inspection points.
Accessible drawers can be opened gently. We look along corners and joints without removing fixtures, tipping furniture or emptying hotel contents onto the floor. Handling less makes it easier to keep evidence in its original location.
Our priority is proximity and intended use. A bedside cabinet and the shelf chosen for our suitcase matter more in this first pass than a distant cupboard that will remain unused. In a larger room, we allow extra time instead of rushing every surface equally.
We keep inspected and uninspected storage mentally separate. Finding no signs beside the bed does not mean a wardrobe luggage shelf has already been checked.
Trace upholstery seams and accessible curtain folds
On chairs and sofas, we trace piping, stitched seams and cushion edges with the torch. We inspect accessible folds without stripping covers or forcing attached cushions away from the frame.
Sofa beds and extra beds count as sleeping surfaces when our family plans to use them. We ask staff to set up a sofa bed if the mechanism is unfamiliar, then inspect the accessible mattress and frame before adding personal bedding.
Curtain folds close to the sleeping area get a visual check too, especially where fabric meets a nearby wall or furniture. We do not climb chairs to reach high curtain headings.
The luggage zone gets a final look before bags are opened. If the rack was missed initially, we inspect its straps, underside, joints and hinges now. A hard luggage shelf also needs checking along its edges and wall junction.
Check: Every intended sleeping surface and bag-storage area has had a visual inspection.
Fix: We keep belongings away from any suspect item and record its exact location. “Dark spots beneath the left bedside drawer” is more useful than “something near the bed”.
Step 6: scan wall edges and note unusual odours without opening fittings
Look around skirting boards, wallpaper and socket exteriors
We finish the physical route with accessible room edges near the bed. The torch follows skirting-board gaps, visible cracks and any already-loose wallpaper edge. We look without peeling material back.
These areas matter because bed bugs use seams and crevices beyond the mattress. The inspection is still a surface check, not permission to investigate inside the building.
Sockets and switches receive an exterior visual check only. We never remove electrical covers, insert a card or other object into a socket, or spray into fittings. Suspicious marks around an electrical plate belong in a report to staff, not in a hands-on investigation.
We also avoid moving trailing cables or opening service panels to improve the view. Safe access is the property’s responsibility.
Treat smell as a supporting clue, not a test
A noticeable musty or sweetish smell can have several causes, including conditions unrelated to insects. We note an unusual odour if present, but do not use smell to identify bed bugs.
The reverse is equally important: no distinctive smell does not mean no bed bugs. A lightly affected or concealed area may offer nothing noticeable to our noses, and fragrances do not establish that a room is clear.
There is no need to press our faces close to upholstery or sniff behind furniture. Directed light and identifiable physical evidence are more useful than trying to recognise a supposed signature scent.
Check: Accessible room edges have been scanned safely, with electrical fittings left untouched.
Fix: We report suspicious clusters of marks or insects around wall edges. Any investigation inside electrical or building spaces is left to authorised staff and appropriately qualified professionals.
Step 7: photograph and contain suspicious evidence
Record the location before disturbing the evidence
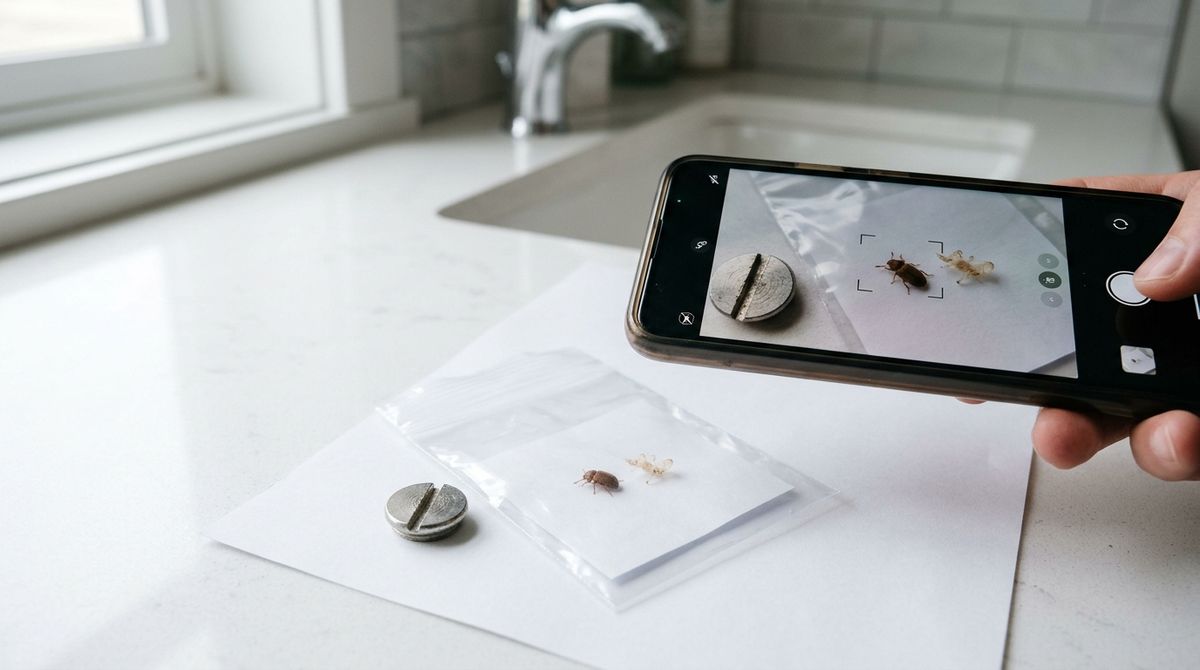
We take one wider photograph showing where the finding sits, followed by close-ups of the suspected insect, skin or marks. The wider image connects the evidence to the room; the close-up helps identification.
We record the room number, date, time and precise location in a short phone note. “Head-end mattress piping beside the wall” gives staff a place to inspect even if the insect moves before assistance arrives.
For scale, we can use a nearby fixed feature already in view, such as stitching or a screw head. We avoid placing a passport, phone case or other belonging against the evidence merely to improve the photograph.
A sharp original image is more useful than a heavily edited screenshot. We save originals, along with written messages to the hotel or booking platform. If lighting is poor, we try another torch angle rather than applying a filter that changes colour and detail.
Secure a specimen only when straightforward
If collection is simple, we enclose the suspected insect in a clear sealable bag or suitable closed container without bare-hand handling. The container stays securely closed and is identified as evidence.
We do not crush the insect, chase it across the room or carry it loose to reception. Preserving the body helps identification, while containment reduces the opportunity for movement into another area.
Collection is optional when it creates difficulty. An insect deep inside a fitting is better left in place for staff or a professional than pursued with improvised tools.
Check: Our evidence is identifiable, tied to a location and contained where feasible.
Fix: If collection risks spreading insects, damaging property or causing contact, we rely on photographs and ask staff to collect the specimen. Clear documentation is useful even without a captured insect.
Step 8: interpret the inspection and choose the next action
The result of a short inspection belongs in one of three practical categories. We match our response to the evidence, not to how reassuring the décor looks.
| Inspection finding | Immediate action | What remains uncertain |
|---|---|---|
| No visible signs | Proceed with protective luggage habits | Concealed insects may be missed |
| Uncertain marks or unidentified insect | Keep bags closed and request identification | The cause is not established |
| Suspected bed bug or multiple consistent signs | Stop unpacking and report promptly | Assessment must establish the extent |
Small populations can be difficult to find. Pale nymphs, hidden harbourages and inaccessible furniture can defeat a careful visual search, especially within a short arrival routine.
Fresh linen, a comfortable mattress and a spotless bathroom do not settle the question. Equally, an old stain does not establish an active infestation. We need to resist both shortcuts.
“No visible signs found” is therefore a useful observation, not a certificate. It supports proceeding with sensible containment rather than abandoning luggage precautions.
Check: Our decision matches the actual findings and acknowledges anything that could not be inspected.
Fix: If new evidence appears later, we reassess immediately. An initially clear check does not outweigh a subsequently discovered insect, skin or cluster of suspicious marks.
Step 9: maintain protection after a clear check
Once the inspection is complete, we keep luggage zipped on the inspected rack or suitable hard surface. Opening a suitcase only when needed reduces the time that compartments and clothing remain exposed.
Worn clothing goes into a closed laundry bag instead of onto the carpet, spare bed or upholstered chair. We keep travel pillows and soft toys with our contained belongings when not in use, rather than leaving a collection beneath the bed.
Under-bed storage is convenient, especially in smaller rooms, but we avoid using it for travel bags. It puts seams and pockets beside an area that is often difficult to inspect properly.
A quick visual recheck makes sense after a bedding change, before using a different bed, or when a new suspicious mark appears. We do not need to repeat the entire search every time we enter the room.
Keeping insects away from belongings depends primarily on placement, containment and attention. Repellency is not the same as clearance, and our explanation of what repellents can realistically do helps keep that distinction clear.
If we use a product, the label must permit its intended pest, surface and setting. We mist lightly, ventilate, and let treated items air out for a few hours before sleeping on a bed or packing a suitcase, following longer label requirements. We do not treat hotel furnishings without permission, and a repellent does not make an infested room suitable.
Check: Belongings remain contained throughout the stay, not only during the first inspection.
Fix: Fresh evidence sends us back to Step 7 for documentation and reporting, not towards adding more spray.
Step 10: report suspected bed bugs and arrange suitable accommodation
Give reception a factual, specific report
Reporting can feel awkward, particularly late at night with children waiting. A short factual account keeps the conversation focused on assessment and accommodation rather than blame.
We supply the room number, discovery location and photographs. If a specimen is securely contained, we offer it for identification without opening the container at the desk.
A simple script is enough: “We found this insect along the mattress seam before unpacking. We would like the room assessed and suitable alternative accommodation arranged.”
For uncertain evidence, we describe the uncertainty accurately: “We found these marks and an unidentified insect beside the headboard. Our bags are still closed, and we would like an assessment before settling in.”
We ask for written acknowledgement and retain booking-platform messages. A brief record of the reporting time and staff contact helps keep the response organised, particularly if a shift changes.
Accusations about poor housekeeping do not help identify an insect. Orkin entomologist Dr Mark Beavers explains that guests can introduce bed bugs at any luxury level, independently of housekeeping standards. (Orkin)
Assess a replacement room before transferring bags
We request accommodation away from the suspected room, not simply the room next door. We also ask what assessment has been completed and whether nearby rooms are being considered in that response.
NPMA travel advice recommends avoiding replacement rooms adjacent to, directly above or directly below a suspected infestation. A different floor or room number still does not guarantee clearance. (NPMA)
Our belongings stay closed and contained while the replacement room is inspected. Moving first and checking afterwards repeats the original exposure problem in another location.
If the response is inadequate, we discuss alternative accommodation with management and use the booking provider’s support process. Refunds, relocation arrangements and other remedies depend on the booking circumstances and applicable terms; none should be assumed.
Leave treatment decisions to qualified professionals
We do not use foggers, improvise heat treatments or spray hotel furniture. A guest-led attempt can scatter insects, obscure evidence and create additional problems without resolving the source.
Treatment may involve several methods selected after assessment, with follow-up where needed. It is not automatically a matter of fumigating a room or an entire floor.
Suspected established or heavy infestations need a licensed pest professional. The property also needs a coordinated response covering affected areas and ongoing monitoring, rather than relying on one guest’s inspection.
Check: We have a documented response and an accommodation option that has been inspected before belongings are transferred.
Fix: If clear evidence is dismissed without assessment, we escalate through management and the booking channel, keeping potentially exposed belongings contained.
Step 11: contain belongings that were already on the bed or floor
Stop moving loose items between rooms
A suitcase on the bed does not automatically mean bed bugs are inside. Possible exposure and a confirmed infestation are different, but containment is the sensible response when suspicious evidence appears.
We stop unpacking, close luggage and place loose clothing into sealable bags. Items that remained contained stay separate from anything that touched the suspect bed, carpet or upholstery.
We do not shake clothing, brush insects onto the floor or empty the suitcase onto another bed. Those actions can turn one uncertain location into several.
If suitable bags are unavailable, we ask staff for some before moving rooms. Larger items need a bag or cover that closes effectively, rather than an open sheet wrapped around the outside.
Clear separation also helps later. A short label describing where an item was placed prevents us from mixing uncertain clothing with belongings that stayed zipped away.
Inspect the suitcase exterior and accessible compartments
Under good light, we inspect zip tracks, stitched seams, handles, pockets and wheel housings. We look closely where fabric folds meet a rigid shell or where a handle retracts into its housing.
Accessible compartments can be checked without spreading the contents around the room. If opening the case would release loose items onto a suspect surface, containment takes priority over completing an elaborate search.
We photograph any evidence and contain the affected item where feasible. Our guide to keeping hitchhikers out of travel bags adds more detail on managing luggage through the journey home.
A clean-looking exterior cannot rule out an insect inside a pocket or seam. Wiping the shell or giving the suitcase a quick vacuum is not a clearance process.
Check: Potentially exposed items are contained and clearly separated from belongings that remained protected.
Fix: A live insect found in luggage means keeping that item isolated and arranging professional guidance before normal unpacking, even if the replacement room looks clear.
Step 12: unpack cautiously at home and assess any later signs
Set up a contained unpacking area
After a holiday or balik kampung trip, we keep unchecked luggage away from bedrooms, sofas and children’s sleeping areas. An uncluttered area with a hard floor is easier to inspect and manage than a bed covered with travel items.
Where exposure was suspected, we prepare the next process before opening bags. Laundry goes directly from its sealed bag into the appropriate laundry process, rather than being sorted across the floor.
We keep untreated belongings separate from processed items. Reusing the same open bag or returning clean clothing to an unchecked suitcase can undo that separation.
A balcony, parked car or sunny patch is not a verified treatment method. Malaysian outdoor heat varies, and the temperature inside a folded garment, suitcase seam or shaded pocket may be very different from the surrounding air.
For travel without suspicious evidence, a calm inspection and organised unpacking routine are appropriate. Possible exposure does not mean every item must be discarded.
Follow fabric-care limits for washable clothing
Ordinary cleaning and a validated heat-treatment process are not interchangeable. A wash that removes dirt does not automatically establish that all bed bug stages have been addressed.
We follow garment-care labels and appliance instructions, then obtain an authoritative bed bug laundry process suitable for the actual equipment and load. A process needs to account for temperature, duration, load size and whether items start wet or dry.
A single time-and-temperature instruction copied from an unverified source can mislead. Overloading a dryer or choosing a gentler programme changes what reaches the centre of the load, while some fabrics cannot tolerate the required conditions at all.
We therefore do not treat “hot wash” or a routine drying cycle as proof of clearance. Where suitable equipment is unavailable, a laundry provider or licensed pest professional can advise on an appropriate process before suspect bags are opened.
Processed clothing goes into a fresh, clean bag or container, separate from untreated belongings. Fabric-care limits remain in place throughout; preventing damage and addressing exposure both matter.
Isolate shoes, electronics and delicate items
Shoes, chargers, electronics and delicate clothing need material-compatible decisions. We keep uncertain items contained while arranging advice rather than applying one treatment to everything.
We do not soak electronics, spray into ports or put unsuitable items into a dryer, oven or microwave. Home appliances and improvised heating methods are not substitutes for a controlled process.
Professional assessment can establish whether treatment is needed and which options suit the materials involved. Some items may need specialist handling; others may only require identification and inspection before a decision.
Short-term bagging contains belongings but does not reliably eliminate bed bugs. Bed bugs can survive for months without feeding, so a bag left closed for a few days is not automatically cleared.
Investigate later skin marks without diagnosing the cause
Marks on skin alone cannot confirm bed bugs or identify where exposure occurred. Timing, appearance and a remembered hotel stain cannot establish the cause without supporting evidence.
We photograph environmental findings and inspect luggage and sleeping areas. Our comparison of similar-looking marks after travel explains why appearance alone is an unreliable basis for identification.
Persistent or concerning symptoms warrant medical advice. Environmental evidence suggesting an established or heavy infestation warrants a licensed pest professional.
Check: Suspect belongings remain separated until an appropriate process is complete.
Fix: If signs recur at home, we stop relying on repeated DIY treatments and arrange identification of the evidence.
Troubleshoot an awkward or inconclusive inspection
Prioritise the bed and luggage zone when arrival is late
Late arrivals are difficult. A sleeping child, delayed flight or long drive can make a thorough inspection feel like one task too many.
Our abbreviated first pass starts with closed bags on a clean, dry hard surface, then covers mattress seams, accessible headboard edges and the luggage rack. These priorities address the sleeping area and the belongings most likely to move home with us.
The shortened pass is not equivalent to the full routine. Fatigue does not make an unchecked sofa bed or inaccessible headboard conclusive.
If safe inspection is not possible, we request staff assistance. We keep belongings contained while that help is arranged instead of unpacking simply because the hour is late.
Ask for help when furniture cannot be moved safely
Heavy beds and fixed headboards are practical limits, not inspection failures. We do not climb furniture, lift a heavy mattress alone or open electrical fittings to finish a checklist.
We tell staff exactly which area is inaccessible and whether other evidence has appeared. That distinction helps separate an ordinary access limitation from a location requiring prompt professional assessment.
A blocked view without other evidence can be recorded as a limitation. A blocked view beside live insects or concentrated spotting needs escalation, not an assumption that the hidden space is clear.
Replace repeated checking with an evidence-based next step
There is a difference between finding new evidence and revisiting the same unexplained stain repeatedly. More photographs of an unchanged mark may not add useful information.
We use a clear image, a contained specimen where feasible and qualified identification to resolve uncertainty. An unverified phone-image identification is not enough on its own, especially with blurred or very small subjects.
Check: Each unresolved finding has a specific next action, such as identification, staff access or an accommodation decision.
Fix: Persistent evidence calls for escalation, not repeated spraying or another attempt to reach an unsafe space.
Adapt the routine for an airbnb, homestay or rental turnover
For accommodation we manage, the same inspection route becomes a documented turnover checklist: sleeping surfaces first, then frames, nearby furniture, luggage areas and accessible room edges. Recording the date, room and findings makes follow-up more useful than a general “room checked” note.
We train cleaners to recognise and report suspicious insects, skins and spotting without expecting a definitive diagnosis. Evidence stays in place where practical until photographed or collected safely, and the reporting route needs to be clear during busy changeovers.
Encasements deserve routine checks at the zip, closure and any damaged area. An encasement supports inspection and management, but covers only part of the environment. Bed frames, seating and neighbouring spaces still matter.
A complaint process should connect the initial report with evidence preservation, accommodation arrangements and professional assessment. We pause use of a suspect sleeping area pending assessment rather than simply changing the sheets for the next booking.
Luxury, cleanliness and a preventive product cannot guarantee absence. A calm, documented response offers a better foundation than a promise that no introduction could ever occur. Where evidence suggests an established or heavy infestation, we arrange a licensed pest professional rather than leaving cleaners to improvise treatment.
Frequently asked questions
Can a five-star hotel have bed bugs?
Yes. Bed bugs can arrive in guest belongings regardless of hotel category, so polished surroundings and premium room rates do not rule out an introduction. The same principle applies to homestays, holiday rentals and budget accommodation.
We use the same pre-unpacking routine across accommodation types. Guest turnover creates opportunities for introductions, but it does not establish that any particular hotel is affected. What matters for our decision is the room’s evidence and the quality of the response to a concern.
Is daytime a useful time to check for bed bugs?
Yes. Bed bugs often hide while the room is occupied or brightly lit, but inspection does not depend on seeing an insect walking across a sheet. Dark spotting, shed skins and eggs can remain visible when live insects are concealed.
We use directed torchlight even during daylight because seams, joints and the underside of furniture remain shaded. Waiting until the middle of the night is not necessary and would mean delaying the check until after settling in.
Can bed bugs jump or fly into luggage?
Bed bugs cannot jump or fly. Bed bugs crawl and can hitchhike in luggage, clothing and other belongings.
Keeping a suitcase elevated on an inspected rack reduces contact opportunities with the bed and floor, but elevation is not a guaranteed barrier. Rack straps, nearby walls and the suitcase itself still need attention. Closed bags and contained laundry add protection without depending on a single precaution.
Can a single overnight stay lead to bed bugs coming home?
Yes, an introduction is possible after one night. There is no minimum stay length that rules out an insect entering an accessible bag or item.
That does not mean every overnight stay is high risk or that possible contact equals an infestation. We focus on the actions within our control: inspecting before unpacking, keeping bags contained and checking belongings before returning luggage to normal storage at home.
Does an absence of bites mean a hotel room is clear?
No. An absence of skin marks does not establish the room’s status. Visible reactions vary, and skin findings are not a reliable room inspection method.
We base accommodation decisions on environmental evidence while recognising the limits of a short visual check. If concerning symptoms appear after travel, Step 12 separates the two useful responses: medical advice for symptoms and identification of insects or other environmental evidence.
Does a mattress encasement or pest certificate guarantee a clear room?
No. An encasement covers a mattress, not the bed frame, headboard, seating or entire property. Its closure and condition also matter.
A certificate provides information about an assessment or monitoring arrangement. We consider what was inspected, when it happened and what the document actually covers, without treating it as proof that no later introduction occurred.
A careful routine can reduce avoidable exposure without turning every trip into a search for certainty. Our small starting action is simply to keep a torch and a clear sealable bag together in the travel kit.
References
The inspection route draws on recognised pest-management guidance covering mattress seams, headboards, seating, luggage precautions and reporting. Identification descriptions use the NPMA material and the expert observations supplied in the research. Professional assessment remains the appropriate route for uncertain specimens and suspected established infestations.
The references linked throughout support the practical distinctions made here. Overseas encounter percentages, dated hotel costs, sponsored certification premiums and seasonal claims have deliberately been left out because none establishes the risk in an individual Malaysian room. Numerical heat-treatment instructions are also omitted rather than presenting an unverified appliance process as reliable clearance.